Quarter-Inch Seam Allowance
Heather Thomas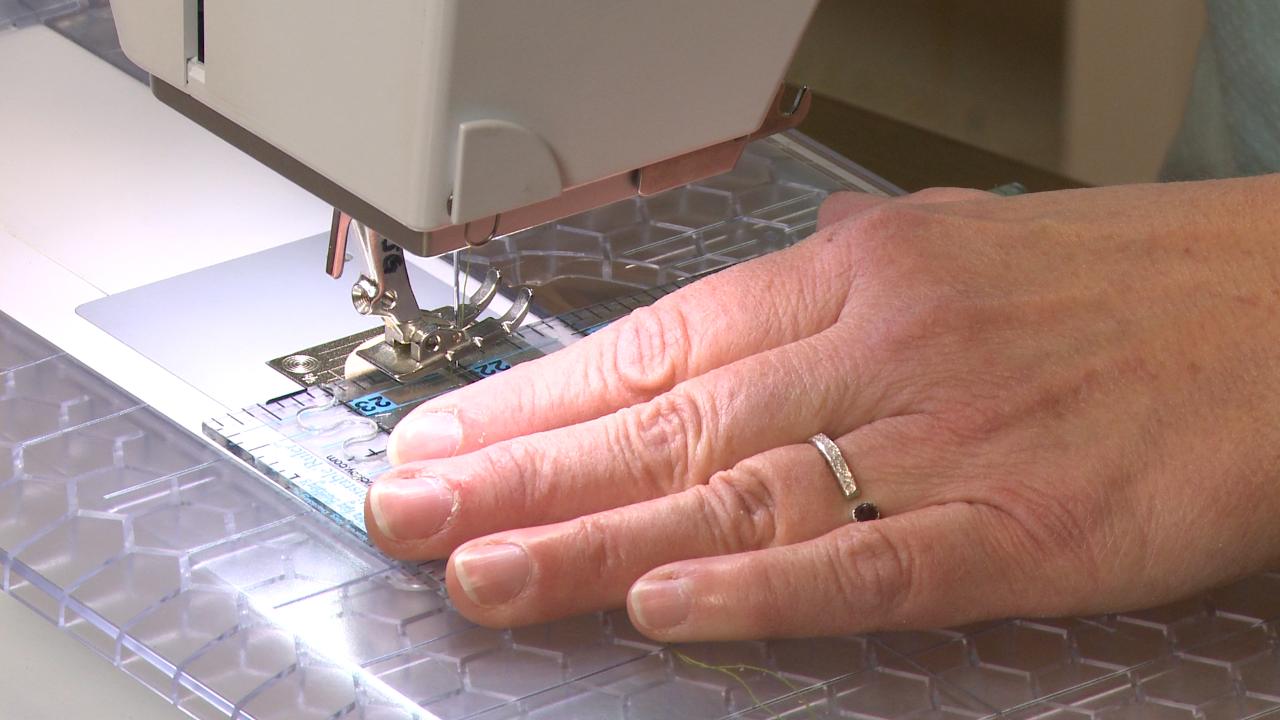
Consistently stitching an accurate quarter-inch seam allowance can be difficult. Heather Thomas shows you a fun tip on how you can use a thick, sticky-backed product on your machine to mark a quarter-inch seam allowance and help you stitch it with accuracy and ease.
How to Use
Heather explains that the key to using some kind of product to mark the quarter-inch seam allowance on you machine is that the product has some height to it. She shows the product she uses, which are bunion pads, and explains that moleskin can also be used. Heather shows how to begin by first cutting a straight edge along whichever product you are going to use. Moleskin can be found in larger square sheets whereas bunion pads are generally round, however it always a good idea to ensure a straight cut before adhering it to your machine.
Heather then shows how to use your ruler to measure a quarter-inch seam allowance distance from your needle. Even if you have a marker on you throat plate you should still measure to ensure accuracy. Once you have measured you can place your moleskin or bunion pad on your machine.
Heather then explains that you should test your seam allowance on scraps of fabric before starting a new project. She also explains how it is a good idea to stitch using a scant quarter-inch seam allowance for most quarter-inch seams because of the small amount of fabric that ‘gets lost’ in the seam when it is opened and pressed. The bunion pads and moleskin will should stay in place for a good length of time and can easily be removed if necessary. While having it in place will help you stitch any quarter-inch seam allowance it is especially helpful when stitching long strips.