How to Add a Diagonal Stitch
Ashley Hough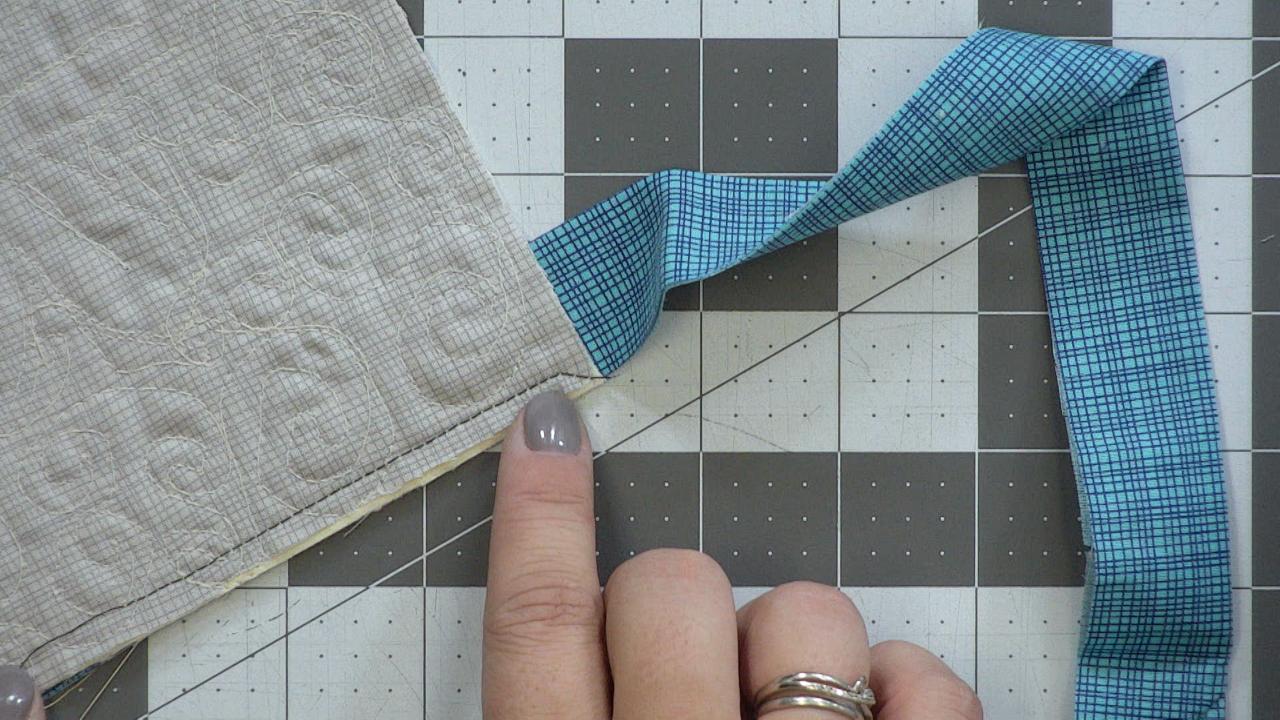
Adding a binding is the final step in most quilting projects, whether you are making a large bed sized quilt or a simple wall hanging. For some, turning the corners and making a perfect mitered 90-degree turn is the most difficult part. Ashley Hough shares a quick tip that can make turning those corners a little easier: a simple diagonal stitch.
Mitered Corners and the Diagonal Stitch
Before you can add a diagonal stitch to your mitered corner, you must first make your binding and begin attaching it to your quilt. You can use either binding that you make in your desired width or pre-made binding for this technique. Ashley demonstrates how to begin attaching your binding to a small quilt sample by starting in the center of one side and leaving a long tail for being able to join the ends. She shows how to stitch the binding to the quilt using a standard ¼” seam allowance.
As you approach the first corner of the quilt while stitching the binding in place, you will need to stop ¼” from the edge. Ashley shows how you can eyeball that measurement if you are familiar with quilt piecing and can accurately gauge ¼”, or you can measure and make a mark ¼" from the edge. When you reach this mark, rather than stopping the stitching and taking the quilt off of the machine, Ashley shows how to rotate the quilt and the binding 45 degrees and take a diagonal stitch right off the edge of the quilt.
Once you make this diagonal stitch, you can then remove the quilt from the machine and fold the binding up and away from your project, as with normal quilt binding application. This simple diagonal stitch ensures that your fabric is folded at a 45-degree angle at the corner and creates the perfect miter.