Simplify Cuts on Your Miter Saw
George Vondriska
I use my miter saw for precise length cuts all the time, but I also frequently use it to rough-cut stock to size. When I’m rough-cutting parts to size the parts don’t have to be an exact length. Adding simple lines to my miter saw stand really simplified the rough-cutting process for me.
Back in the day…
My old approach to rough-cutting stock was to grab a tape measure, measure out the rough length, cut a board, measure out rough length of the next one, cut a board … you get the picture. I wanted to make this a more efficient process. One where I could simply walk up to the saw and make the cut, minus the tape measure and marking.
I made a change
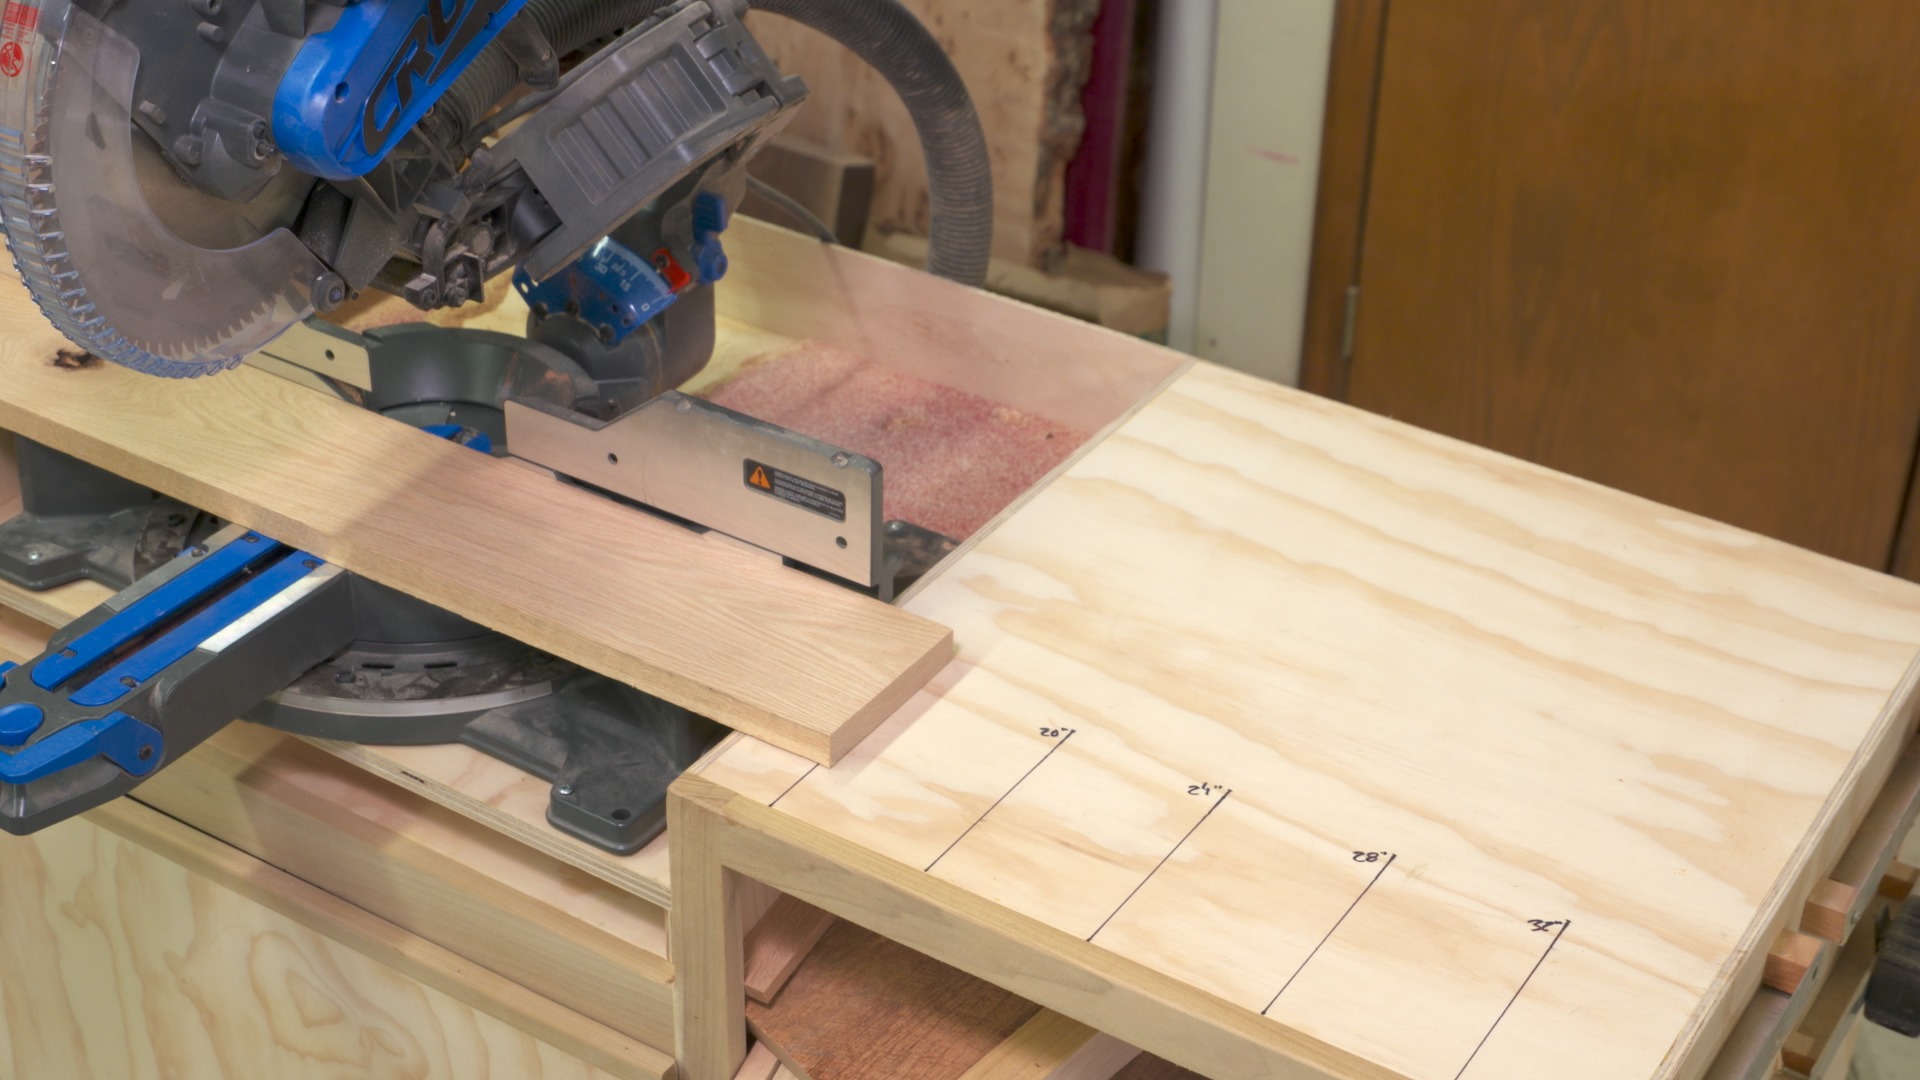
One day in the shop I had an epiphany moment. I have large horizontal surfaces on both sides of the saw, and it occurred to me that I could put rough-cut lines on those surfaces. In the end I made marks every 4" starting 16" from the saw blade. I made the lines with a heavy felt tip and also marked out the length each line is providing.
Man, this works great
Now when I walk up to my miter saw to do rough cuts all I have to do is put the end of the board on the length line I want to use and make the cut. My lines are 4" apart but that doesn’t limit my cuts to the line locations. You can also align the board between the layout lines to hit other lengths.
Check out this video for more on how to use a miter saw.