Quilting Undulating Lines with Circles
Heather Thomas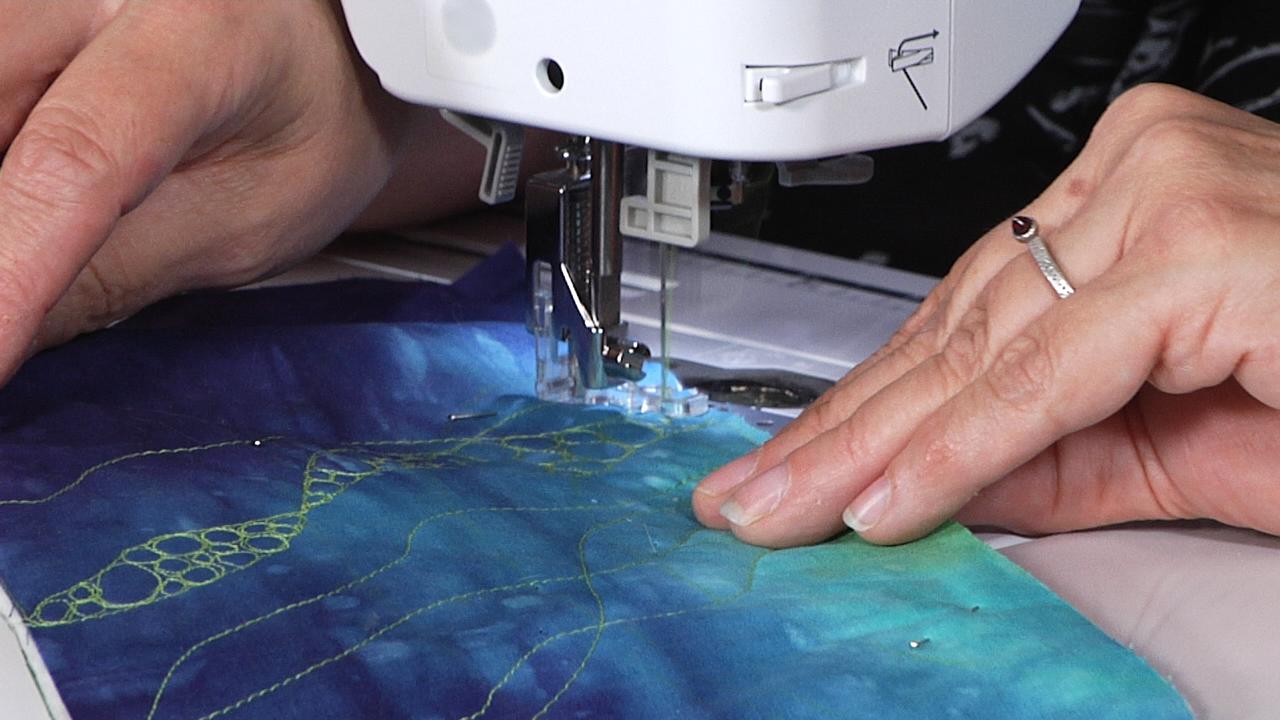
Small circles can be fun to quilt. However, they can be tedious to do and take lots of time to complete. Heather Thomas shows you how to quilt a combination of undulating lines and small circles that creates a striking look when finished.
Undulating Lines
Before you start quilting any circles, you must first lay out your undulating lines. Undulate means to move in a smooth, wave-like motion, which is how you want your lines to look. Quilting lines in this manner is much easier than trying to quilt straight lines or a grid pattern because you don’t have to do any measuring or marking before you start quilting. Heather shows how she starts at one edge of her quilt and stitches a gentle wavy line across to the other side. She then pivots at the edge and quilts another undulating line across to the side she started at. Heather continues stitching several lines, explaining why she pivots at the edge of the quilt rather than traveling along to start at another section. She also shows how you can connect the lines or have them cross one another to make smaller sections to fill with other quilting later.
Circles
Once you have quilted all of your undulating lines, you can begin quilting with design elements, which in this case are the small circles. Heather explains how to use the lines as boundaries for the circles so that the entire area doesn’t have to be covered. She shows how she stitches the circles, beginning at one end of a section created by the undulating lines and working her way to the other. Heather gives tips on what sizes to stitch your circles and how to make your circles look as clean as possible. She also gives tips on how to decide which sections to fill with quilting design elements and which to leave empty.