Wavy Crosshatch Quilting Behind Appliqué
Heather Thomas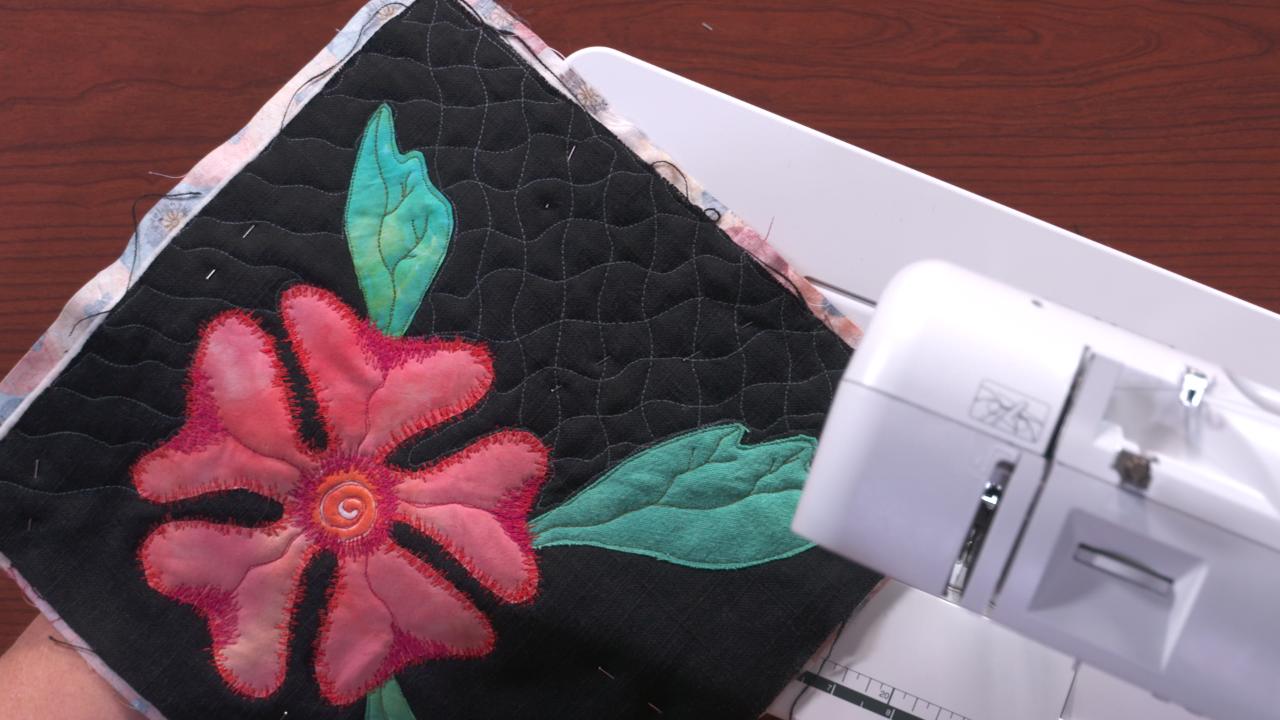
When you have appliqué or other ornate designs on a quilt top, it can be difficult to decide what kind of quilting to do around the designs so as not to take away from them. Heather Thomas shows you how to do wavy crosshatch quilting around an appliqué shape.
Quilting
Heather explains that to do wavy crosshatch quilting, you simply prepare your quilt top as you would any other quilt project by layering your quilt top with batting and backing fabric and then pinning or basting your layers in place. She then explains why doing a wavy crosshatch can be easier and quicker to do than a straight crosshatch because you do not need to worry about your lines being perfectly straight or evenly spaced. Because you do not need to worry about these kinds of things, this is a type of quilting that can be done with no markings needed before you start stitching.
Heather shows how she determines where to start the wavy crosshatch quilting and then demonstrates stitching. She explains how she works around the appliqué shapes or other designs by either following along the edge of the design or doing echo stitching, meaning she is stitching roughly ¼” away from the edge of the design. As she is stitching, she also explains how she determines how far apart to space the crosshatch lines and gives tips on how to keep things looking even and smooth.
Heather also teaches you how to work around a design by stopping on one side and then continuing on the other to make the crosshatch quilting appear as if it is continuing behind the appliqué shape. This type of quilting is great to do in the background as a way to highlight ornately pieced shapes or other applique techniques.